Sunday, May 29, 2016

BBQ Grill Cupcakes


I wanted to make some kind of fun dessert to bring to a Memorial Day BBQ.  So I decided on some BBQ themed cupcakes since we were grilling out.

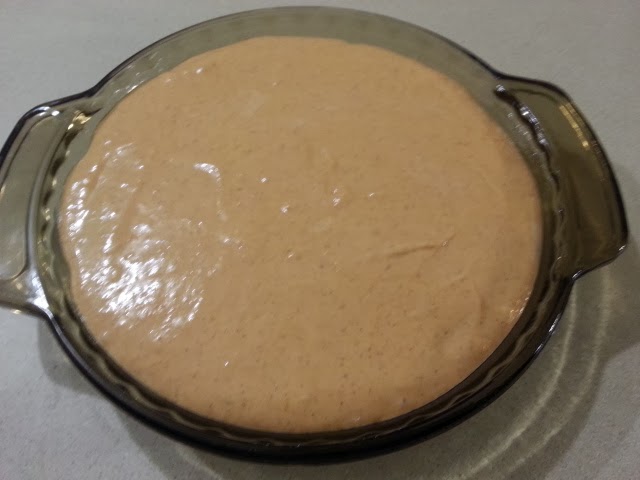
I started with some devil's food cupcakes.  Those are my favorite.  For the icing, I took white buttercream and colored half with yellow and half with red using Wilton icing colors.  I put the yellow icing in half of an icing bag.  Basically I tried to hold the bag horizontally and layer the yellow icing along the long side.  Then I took the red icing and layered it on top.  When holding the bag vertically, there was yellow along one side and red on the other.  I used a large star tip and starting in the center of the cupcake top, I just swirled the icing on.

To make the "grill" part, I drew 12 circles onto a regular sheet of paper using a mason jar lid as a guide.  Then I put a piece of parchment paper over the circle template.  I melted half of a bag of Wilton BLACK candy melts in the microwave.  I started with 1 minute and then added 10 seconds at a time until the candy melts were melted completely.  I added a small teaspoon of crisco shortening to thin the chocolate out a little (do NOT add water to thin it).  I poured the melted chocolate into an icing bag and snipped the tip of the bag.  Using the circles on the template as a guide I made the grill shape, freehanding the lines inside.  I think next time I would add a few more lines.  I let these harden for about an hour on the counter.  You could pop them in the refrigerator to speed up the process, if you wish.  When hardened, I placed these UPSIDE DOWN on the frosted cupcakes.  I thought the smooth side of the grill looked more appealing.


To make the "shish-ka-bobs," I took gummy bears and cut them into pieces.  I used all the colors in the bag of gummies.  I thought the red looked like meat; the green, yellow, and orange like bell peppers; and the white like onions.  I carefully slid 4 or 5 of these pieces onto a toothpick.


Aren't the little hotdogs the cutest???  These were just the pink pieces out of a box of Mike and Ike candy.  I put the "grill marks" onto them by using brown Wilton icing colors and drawing the lines with a toothpick.  After carefully placing these on top of the "grills", the cupcakes were complete.  They are super cute and I think everyone loved them!


Thursday, February 19, 2015

Once a Month Cooking

My husband has been living in another state for the past 7 months due to work.  For the most part, he has been managing fine in an apartment all alone.  He's kept the apartment relatively clean and managed to make food for himself.  Granted, the apartment looks like a college dorm room, but it is livable.

However, this past month when I went to visit him, there was a little difference.  When I got there, his refrigerator looked like this:


I felt a little bad for him since our refrigerator at  home is the exact opposite of this.  So I decided I would make some food items for him to freeze and use until I came back next month.  I didn't have a lot of time since it was Friday of Valentine's Day weekend.  So I started searching the internet for some casserole type items that I thought he would eat.  I immediately thought of those Once a Month Cooking sites and thought something like that would be perfect.  If I could find something that had a half dozen or so recipes with an already prepared shopping list, that would make it easy.  Unfortunately, most of the Once a Month Cooking sites had lots of recipes for crockpot type items.  He doesn't have a crock pot right now, so those wouldn't work.  I needed something that was mostly casseroles or soups/stews.  

I ran across this page for Freezer Meal cooking at The Shabby Creek Cottage.  It was just what I was looking for.  It had all casseroles and/or soups/stews - no crockpot recipes!!  And luckily there was a shopping list.  I didn't have a lot of time for compiling a list.  I wanted to shop on Friday night after my husband came home from work and then cook on Saturday (Valentine's Day) before our planned dinner and a movie.

We went to the store Friday night with the shopping list in hand.  We managed to find everything on the list.  I think our foil pans were different, but what we used worked fine.  We used the 8 x 8 square cake pans.  These didn't come with a lid, like the ones she used on the website, but they worked.  I just purchased a long roll of foil to cover the pans.  Our grocery bill was $219 but that included a few items not on the list - including some fruit, cereal bars, and a few other items.  So, I would say you could buy everything to make these freezer meals for less than $200.  

We ran into a little snag in that the large grocery bill set off the fraud detection alert on my out of state debit card!  So we had to take care of that.  Hopefully you won't have the same problem. 

On Saturday morning, I got started early making the items.  It wasn't easy in his tiny kitchen and with his hand me down cooking supplies!  But we made it work.  


Here is what I ended up making:

6 pans of lasagna
6 pans of broccoli cheddar chicken pasta bake
4 pans Tex Mex chicken and rice casserole
1 9x13 glass casserole of Tex Mex chicken and rice casserole
6 pans basic chicken casserole
2 gallon bags marinara sauce
4 gallon bags chili
12 hamburger patties
5 chicken breast patties to be cooked and put on salad
4 one pound bags of meat to be used for tacos/spaghetti sauce, etc.
Plus, we had spaghetti for lunch using some of the marinara on our cooking day.


Lasagna


Broccoli Chicken Pasta Bake


Classic Chicken Casserole


Chili


Tex Mex Chicken Rice Casserole


And here is what his freezer looks like now:


The picture doesn't include the hamburger I made into patties and the 1 pound bags of hamburger.  I didn't make all the recipes from the original website because there wasn't enough room for any more pans in his freezer!  So that is why I had some meat left over.

I think these casseroles will probably last him 3 months!  Each one is probably 3 or 4 days of dinners for him.  He already baked the 9x13 glass pan of Tex Mex Chicken Rice Casserole because we couldn't fit that into the freezer.  I was a little concerned about him liking that particular casserole because he is not a fan of Mexican food.  But he said it was good.  He baked it and then put a little salsa, sour cream and jalepenos on top!  

I am currently in the process of converting some of his favorite recipes into this once-a-month-cooking style and hope to have a shopping list made for the next time.  Stay tuned!


Sunday, May 11, 2014

A Rigatoni Cake for Mother's Day!

Rigatoni Cake

Ingredients

bolognese sauce (found on my previous blog post or any meat sauce you prefer)
bechamel sauce (found on my previous blog post) OR 4 oz. ricotta cheese
LARGE rigatoni pasta (the largest you can find)
oil for coating pasta
1 cup parmesan cheese
1 cup mozzarella cheese
springform pan

I saw a rigatoni pie recipe on the Martha Stewart website nearly a year ago and have wanted to make it ever since.  Life got in the way and I was never able to fit this in.  I planned on making it several times for holidays (Christmas, Easter, etc.), but it never seemed to make it on the menu.  So, when the girls asked what I wanted to do for Mother's Day, I said that I just wanted to make the rigatoni pie together.

A couple of months ago, Meghann and I went to Eataly in downtown Chicago.  Eataly is a gourmet Italian grocery store/cafe that recently opened. Anyone who needs to buy ingredients for Italian food MUST go there.  There were probably 6 or 7 aisles of dried pasta alone!  I found a bag of rigatoni that I knew would be perfect for this recipe.


On the Saturday before Mother's Day, Meghann and I went to the grocery store to make sure we had everything we needed for the pie.  On  Mother's Day after lunch, I started making the sauce.  I decided to use my Bolognese Sauce from a previous blog post instead of the recipe Martha Stewart used.  I knew my sauce was delicious and I thought the combination of meats would work great for this.  I let the sauce simmer for 3 hours while I took a nice walk with my husband through the forest preserve.


Most of the recipes I have seen of rigatoni pies like this call for ricotta cheese.  I'm not a fan of ricotta cheese (GASP!), so I thought I would use a bechamel sauce in it's place.  The recipe I used can be found in a previous blog post of mine also.  


Preheat the oven to 400 degrees.  Now that the sauces were made, I just needed to assemble the rigatoni pie.  Boil the noodles until they are al dente (about 10 minutes).  Drain the pasta and rinse with cold water.  Drizzle a little oil over the noodles to prevent sticking.  Add 1 cup of parmesan cheese to the noodles and toss to coat.


Now comes the fun part.  You need to stand up the rigatoni noodles on their end in a springform pan.  Make sure you pack these in tightly, but you also want to make sure to keep all the holes in the noodles open and not pressed closed.  The parmesan cheese helps hold the noodles together.


Pour the bechamel sauce over the noodles.  If you are using ricotta cheese, you would spread it over the top of the noodles.


Add the bolognese sauce one ladle at a time. After each ladle, push the meat sauce down into the holes of the rigatoni.  My sauce was still too warm to touch, so I used a chopstick to push the sauce into the holes.  But if your sauce is cooler, you could push it in with your clean fingers.  Take your time with this so you don't leave any voids.


Sprinkle a little parmesan cheese on top, place on a cookie sheet with rims in case of leaks and bake in the oven for 15 minutes.  Take the pan out of the oven and sprinkle with one cup of mozzarella cheese. Return the pan to the oven for 15 more minutes.  I did not cover the pan either time.  Remove from the oven and let cool 5 minutes.  I ran a knife around the edge of the springform pan before unmolding to make sure it wouldn't stick.  But it didn't seem necessary as there was no sticking.  Release and remove the side of the springform pan to unveil your masterpiece!!  


I wasn't sure if it would stick together without the ricotta cheese, but it did!  It really looked beautiful.  However, since we used a springform pan AND since the noodles stood pretty high, I thought this looked more like a CAKE than a PIE, so I named this the Rigatoni Cake!!

The family couldn't wait to cut into it.  And it disappeared immediately!  I served it with some garlic breadsticks and a salad.


Saturday, February 8, 2014

Maple Bacon Walnut Sticky Buns

With my husband away on a business trip, I woke up Saturday morning with the whole day to myself!  I thought, what can I do today??  I had some errands to run, but other than that my day was wide open!  So I decided to try a few new recipes.  Hopping on the bacon craze, I started the day making some Maple Bacon Walnut Sticky Buns for breakfast.  I got the idea from this blog post.


Ingredients


6 pieces of bacon
1/4 cup pancake syrup (or maple syrup)
1/4 cup brown sugar
1/2 cup chopped walnuts
1 tube refrigerated Grands biscuits (8 count)
cinnamon


Directions


I started out by cooking the bacon in the microwave.  On a dinner sized plate, I placed 2 paper towels.  Then I laid out the bacon on the paper towels and then covered it with another paper towel.  I microwaved the bacon in 2 minute increments until it was crispy - about 6 minutes.  I then chopped the bacon into little, bite-sized pieces.


Then I moved on to the topping.  Mix the pancake syrup, brown sugar and chopped walnuts.  Add in the bacon bits.  Spray a muffin pan with cooking spray.  Divide the topping mixture into the 12 muffin spots. 
  

Open up the refrigerated Grands biscuit tube.  There are 8 biscuits in the tube.  I cut each biscuit into 3 pieces, for a total of 24 pieces.  Place 2 of the dough balls into each muffin spot and press down a little.  The biscuits will puff up a little, so make sure you leave some room.  Sprinkle the top with a little cinnamon.


Place in a 350 degree oven for about 15 minutes. When they turn slightly golden, remove from oven and invert the muffin tin onto a platter.  Replace any of the topping that might fall off immediately, while it is warm before it hardens.

The resulting sticky buns are more delicious than can be imagined.  I had to restrict myself to just 2 for my breakfast!  The slight bacon taste with the maple topping really works!  I wasn't sure how I would like it, but it was delicious!

If you are vegetarian, you could leave off the bacon.  It would then be a regular, maple walnut sticky bun - but would still taste great.


Monday, November 25, 2013

Homemade Green Bean Casserole

One of the most popular side dishes for Thanksgiving is the traditional green bean casserole.  This is usually made with a cream of mushroom soup and dehydrated onions.  I have never found this very appetizing - until I saw the Alton Brown episode where he made a homemade version of this.  I thought it looked really great and much healthier than the traditional recipe.  And it didn't really seem any more difficult.  So I decided to give his recipe a try.  The recipe can be found here.

Homemade Green Bean Casserole

Serves 6.


Ingredients

For the topping:

2 medium onions, thinly sliced
1/4 cup all-purpose flour
2 tablespoons bread crumbs (panko recommended, but I used regular)
1 teaspoon salt
Nonstick spray

For beans:

1 pound fresh green beans, rinsed and trimmed
1 gallon water
2 tablespoons salt

For sauce:

2 tablespoons unsalted butter
12 ounces mushrooms, trimmed and cut into 1/2-inch pieces
1 teaspoon salt
1/2 teaspoon pepper
2 cloves garlic, minced
2 tablespoons all-purpose flour
1 cup chicken broth
1 cup half-and-half


Directions

1.  Preheat the oven to 475 degrees F.

2.  Combine the onions, flour, breadcrumbs and salt in a bowl.  Toss until the onions are coated.  Spray a cookie sheet with the nonstick spray.  Then place the coated onions onto the cookie sheet and arrange in a single layer.  Bake for 30  minutes or until golden brown.  Make sure you turn the onions over approximately every 10 minutes.  You really need to watch that these don't burn.  When the onions are golden brown, remove them from the oven and set aside to cool.


3.  Turn oven down to 400 degrees F.

4.  Bring a pot of water large enough to cover beans to a boil with the salt.  Cook these for 10 minutes.  Drain in a colander and plunge into a large bowl of ice water to stop the cooking.  Then drain the beans.


5.  Melt the 2 tablespoons of butter in a large nonstick pan.  Add the mushrooms, salt and pepper.  Cook for 4 to 5 minutes, stirring occasionally.  Add the garlic and cook for another minute - make sure you stir so that the garlic doesn't burn.  Now sprinkle the flour over the mixture and stir.  Cook for approximately 1 minute.  Add the broth and stir for 1 minute, making sure to remove any lumps.  Now add the half and half and cook until mixture thickens, about 6 to 8 minutes.


6.  Remove the sauce from the stovetop and stir in the green beans and 1/4 of the onions.  Add this to a casserole dish that was sprayed with the nonstick spray.  Top the green bean mixture with the remaining onions.  Bake in the oven until bubbly, about 15 minutes.  Remove from oven and serve warm.


My husband gave this two thumbs up and declared it better than the traditional recipe for Green Bean Casserole.  He said it tasted fresher.  I think this would be perfect to try for Thanksgiving to impress you mother-in-law!

Tuesday, November 19, 2013

Pumpkin Spice Two Layer Cheesecake

This blog is the third in my pumpkin series on ThisChemistCanCook!  I really love cheesecake and thought it would be fun (and delicious) to make a pumpkin cheesecake.  I decided to layer it to make it a little more interesting.  This recipe is for a really quick and easy cheesecake using a regular pie plate.  If you wanted to get more fancy, you could double the recipe and then put it in a springform pan for a thicker cheesecake. I based my recipe on the Kraft recipe for the 3 step cheesecake.

Ingredients


2 packages cream cheese, softened
1/2 cup sugar
1/2 teaspoon vanilla
2 eggs
1/2 cup pumpkin (canned or homemade puree - see previous blog post)
1/2 teaspoon ground cinnamon
dash nutmeg
(dash of cloves, if desired)
8 graham cracker blocks, crushed to crumbs (each block is 4 rectangles of crackers)
2 Tablespoons butter, melted
(or instead of the graham crackers and butter, you can use a ready made graham cracker crust)
whipped topping, if desired


Directions:


1.  Preheat oven to 325 degrees.
2.  Take your graham crackers and put them in a big ziplock bag.  Use a meat tenderizer mallet or rolling pin to crush the graham crackers until in crumbs.


3.  Mix in the melted butter and stir until moistened.


4.  Push the graham cracker mixture onto the bottom of your pie plate.  The amounts that I listed in the ingredient list make a very thin crust.  If you want a thicker graham cracker crust, you could double both the number of cracker blocks and butter.


5.  Beat the cream cheese, sugar and vanilla with a mixer until smooth.  Make sure the cream cheese is softened before you do this!  Add the eggs one at a time, thoroughly mixing in between additions.


6.  Reserve one cup of this cream cheese mixture and set aside.

7.  Pour the remaining cream cheese mixture over the graham cracker crust in the pie plate.


8.  Using the reserved cream cheese mixture, add the pumpkin, cinnamon and nutmeg (and cloves, if using).


9.  Pour the pumpkin batter over the plain cheesecake batter in the pie plate.


10.  Bake 40 minutes until center is set.  Cool, then refrigerate at least 3 hours or overnight.  When serving, top with whipped topping, if desired.


This recipe was a big hit with my family.  And it was so easy to do!  Sometimes cheesecakes can be so tricky to make with the springform pans and water baths.  But this one is so easy you could make it on a weeknight.  The family has already asked that I make this again soon.